Save Pin
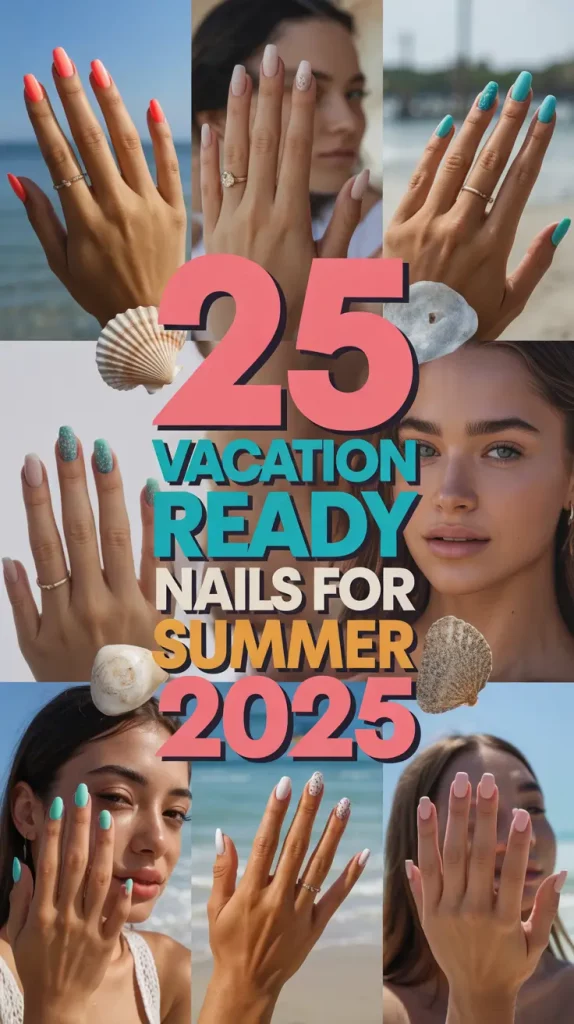
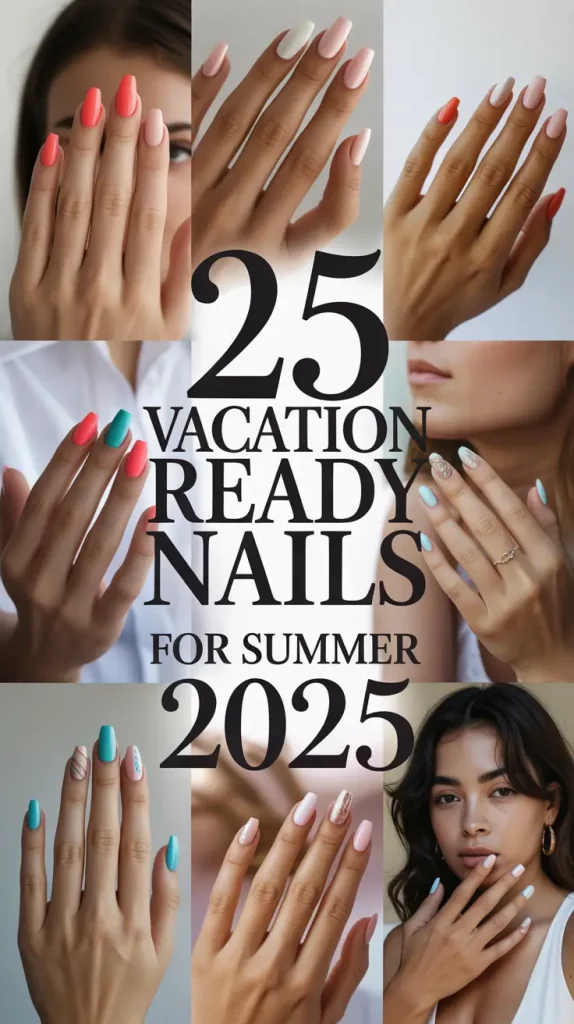
The long-awaited summer is here! Sunscreen on standby and pop-ice in hand. Traveling to your favorite vacation destination? Relaxing in the backyard with a book? No matter where you plan on going, you can never go wrong with getting a manicure to match the season, as nails are ultimate travel companion. But the real question is: what kind of manicure how does summer 2025 look like?
There’s nail art that starts trends rather than follows them; glowing neons accompanied by simple squoval shapes are just a few examples. Everyone nails the short almond look so effortlessly so this summer it’s all about bold and adventurous styles with acrylic tips and even playful designs all while letting fingers shine. And if that isn’t enough, all of these designs look stunning and are perfect for a summer getaway! Looking for the right design for your next trip? Keep reading!
Holographic Mirror Glaze Drama
If there was a way to bottle glitter, it would shine the way summer shines over the ocean reflecting soft lilac, seafoam and blue towards the chrome gleaming top of the nails. The look is warm towards pointed shapes and harmonious with vivid mermaid meets futuristic runway첨deo monitor schlagen.
The shimmering effect described marks this as a ‘vacation-ready’ manicure for Summer 2025. This look would be perfect for those of us rocking ‘main character energy’ on holiday. It’s trendy, bold, and honestly hypnotizing.
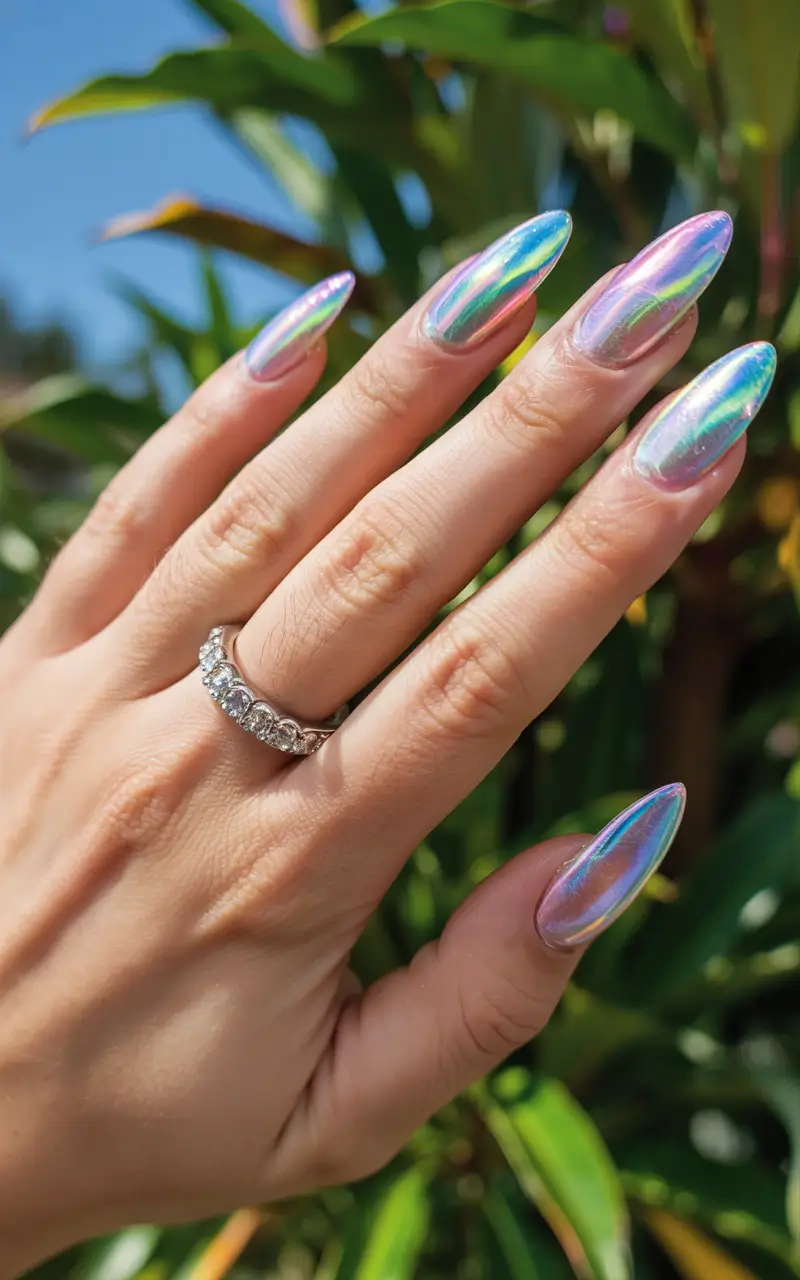
Getting that liquid chrome effect usually demands a bit of work. I typically use daily charm’s ‘Unicorn Chrome’ powder over a pearl or blush pink gel base. With the right technique, the base coat ensures the outcome is smooth and delightful since it sets the tone for how light will bounce off the manicure. Finish with a high gloss top such as the Aprés Top Gelcoat for an endless wet appearance.
The first thing you want to do is set up with a full gel manicure and cure each layer under an LED lamp. While looking the best with milky or soft colored bases, the manicure looks most impressive when chrome powder is added in layers. After doing the base and color gel application, chrome powder can be applied with sponge dabbers and sealed with top coat. It should be noted that Zola Ganzorigt, the celeb fame nail tech behind Hailey Bieber’s glazed donut nails, swears by this technique and it really does pop better that way.
This part reminds me of the boat party I went to last summer, where I caught several people looking at my hands during golden hour. All I needed were these nails and a rosé spritz. No regrets here.
Tropical Sunrise Ombre
Just looking at this one, you can practically hear the steel drums. With the addition of white swirls and a floral accent bursting with plumeria vibes, these vibrant and juicy nails fully embrace vacation mode with the gradients of yellow, lime, turquoise, pink, and coral. They exude bright optimism and radiate cocktail vibes by the beach. I will consider this option for my vacation beach pink ideas.

For the ombré fusion, I like The GelBottle’s “Banana Split,” “Peony,” and “Aqua Blue.” With a nail art brush, I blend the colors and gently feather them together. The little bloom can be painted by hand or applied with a water decal if you’re short on time.
To achieve this at home, you need a blending sponge (it’s easier than it looks!) and a fine detail brush for that flower. Remember to cure between layers while capping the edges so the colors don’t fade even after dipping into the pool. Gel ombré, as noted by celebrity manicurist Elle Gerstein, certainly lasts longer—and she isn’t wrong.
There’s a playful gradient on the nails that brings out that tanned skin, enhanced further by the sunlight. I would call it vibrant, but without the wild aspect of colors. This works perfectly for me and captures tan lines all too well.
Safari Chic Nail Art
Right? Featuring animal designs painted by hand against a nude background, these nails are chic and fun at the same time. A tropical vibe is added with a parrot along with the bunny, tiger, zebra, and crocodile. The look is stylish yet fun and perfect for a family summer vacation or a friendly visit to the zoo. That’s where the freehand detail transforms nail art into storytelling magic.
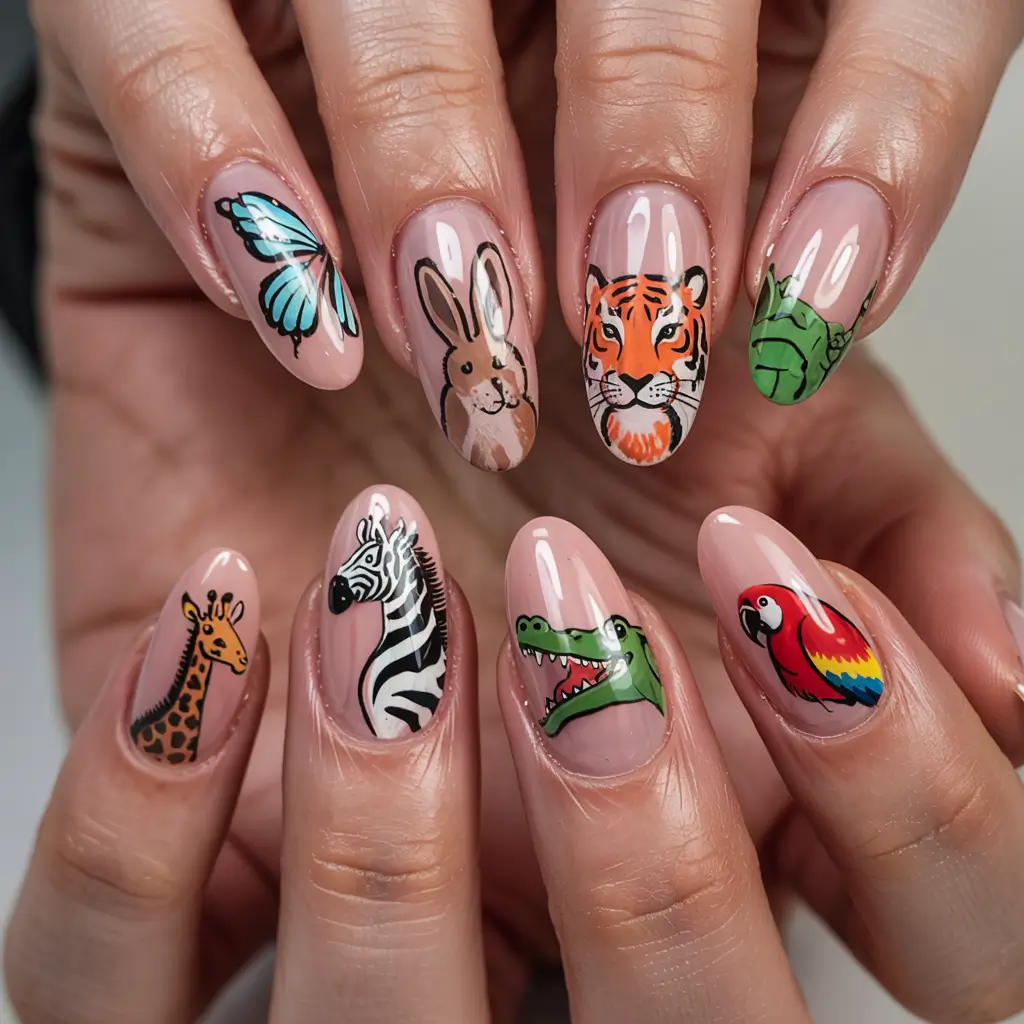
When it comes to animal prints, I prefer sketching them with a fine liner on gels by Kiara Sky or Beetles. You can either take your time to paint it directly or use good decals. OPI “Bare My Soul” serves as a perfect matte nude base to showcase the animals.
For the animal art, applying the nude base and curing it is step one. If you decide to paint the animals, lightly sketch the outlines with a pencil. For finishing and adding detail, use fine tip brushes and white and black for contrast. Put on a glossy or matte top coat depending on your final look.
Last year at a music festival, one of my friends wore this style and received limitless praise for her hands, which is surprising considering how wild it is. This design is so edgy yet easy-breezy at the same time. And yes, there are two posts on Instagram about it.
Ocean Breeze French Fade
The blush pink base and sea-glass blue tips make it look like you dipped your fingers in water and came out with mermaid nails. This modern French tip design is understated yet dreamy. It gives off a delicate aesthetic while still having a subtle presence. An ideal description would be effortless beach vacay.
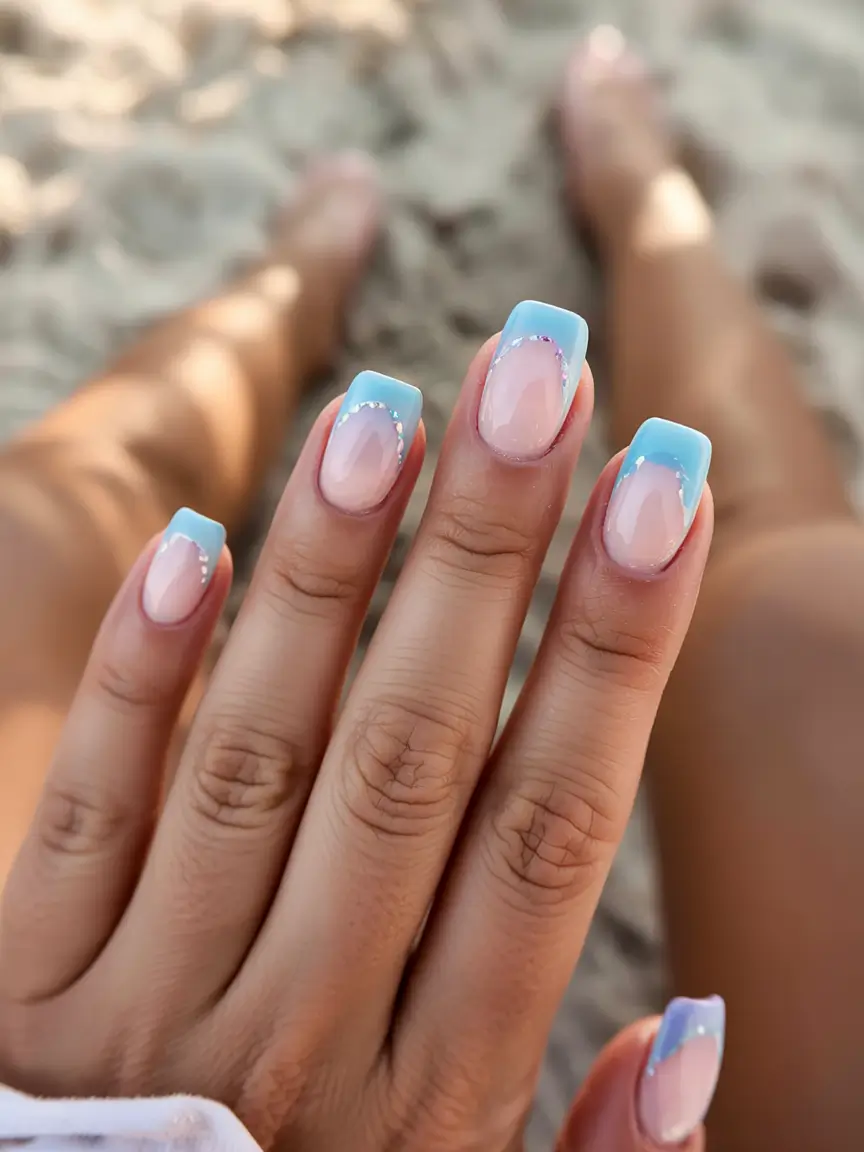
For this manicure, I prefer OPI’s “Bubble Bath” and “No Room for the Blues” for the tips. You can apply the tips either sharply with a soft sponge or painted directly, then blended for a smooth finish. Feel free to add tiny crystal charms for a bit of bling if you’re feeling extra.
This can be done as a soft gel polish or using builder gel for structure. With either method, layers must be cured separately and then buffed for smooth application. Brittney Boyce, a nail artist, commented that French fades help in elongating the appearance of the nails, which I think works well for every hand shape.
This complemented my linen dress, my phone case, and my vibe, making it perfect for beach picnics. Also, it is the kind of manicure that doesn’t scream attention but quietly earns it.
Lime Zest Realness
This one is for the bolder girls. The large slices of lime along with the leaves are a fun addition gel meets ideal for poolside. A bright and electrifying green is its color. Juicy art paired with contrast neon solids makes this stand out as a choice for those who want their nails to do the talking.
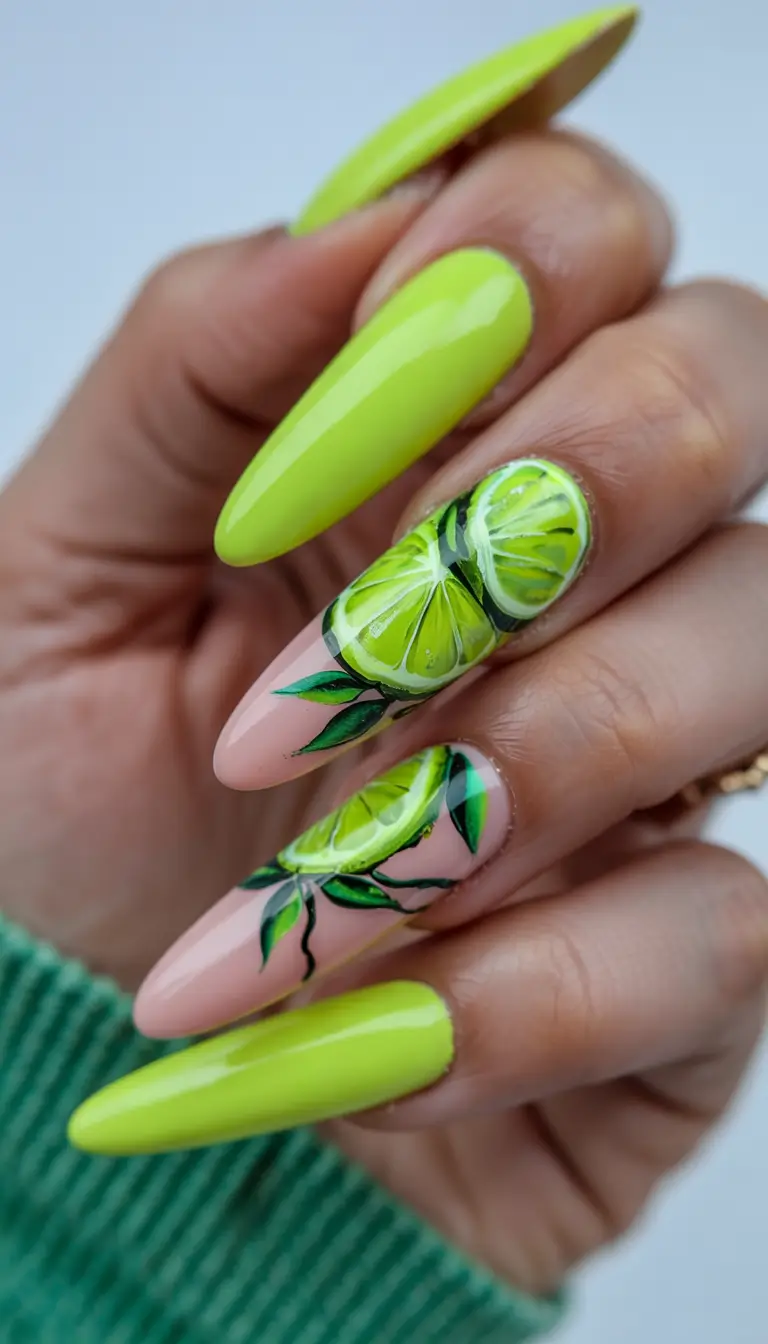
For the neon, ORLY’s Glowstick and Lights Lacquer “Now & Later” both works well. For the art, any high-quality gel liner is perfect, but I personally use the Nail Reserve Detail Art set because their fruit motifs are super sharp.
To create your manicure, apply a neon base as the base on your acrylic or gel extensions. After that, with a fine liner brush, draw the citrus patterns: outline, fill, and add shading with a little white and dark green. Finish with a bright top coat. Just as important, Olive & June suggests flash-curing details before outlining to prevent smudge—and honestly, that saves lives (or at least your manicure).
This design strikes me as the inside of a beach cooler: incredibly bright, tangy, impossibly refreshing, and unforgettable. Personally, I would wear this when sipping margaritas on a rooftop or while running errands in a straw hat and lip gloss.
Pop Yellow With Matte Lemon Slices
This manicure screams summer fun like an energized platter of food! The crisp, full matte yellow polish is a stunner by itself, but with those lemon slices on top, it’s like having a lemonade stand in your palm. The combo of clean and bold is always in, making this look trendy yet perfect for a summer picnic or poolside brunch.
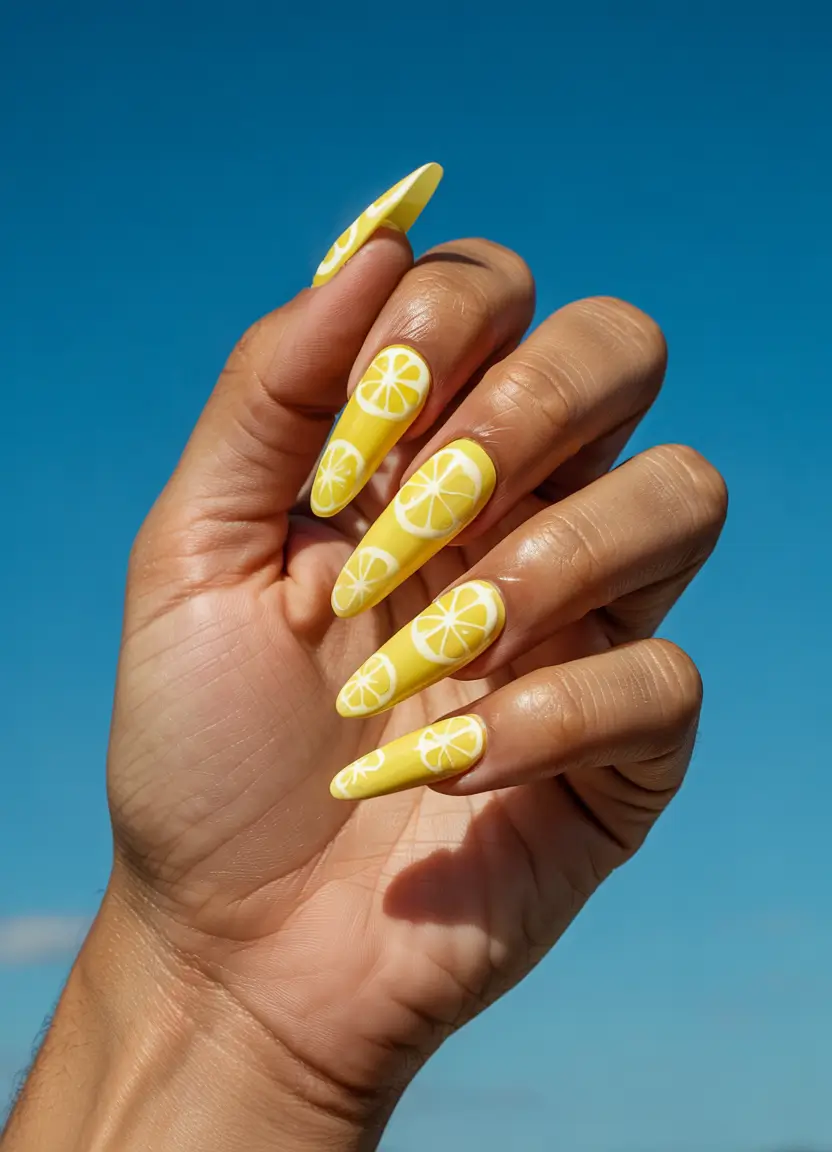
For the lemony look, start out with a base coat of OPI’s “Exotic Birds Do Not Tweet” or Lights Lacquer “Slice of Life.” The citrus details can be hand-drawn with a gel brush or for an easier DIY option, with nail stickers. A lemony fragrance is sealed on with a matte top coat.
You need to build up the color in thin, even layers, curing completely between each coat. If you are sketching the lemons out, do it gently first and then with a detail brush, outline the inside and outside parts of the fruit. Use Gelish no wipe matte top coat for final finish; it cures the gloss sufficiency without making it shiny while intensifying the yellow color.
I associate the lemon themed designs with summer somehow. Just like that one time I had a lemon margarita with a sugared rim—the glass was too gorgeous to drink from. These nails scream that sort of attractive but playful vibe.
![]()
Cherry Sweet Meets Wild Chic
This one is flirtatious with a twist, literally. Minimal red cherries on a nude background are so soft yet serve some cute energy. The best part is a rebellious accent nail in cheetah that adds the best twist to the sweet charm. This short and flirty design captures two summer moods: nostalgic girly and wild independence.
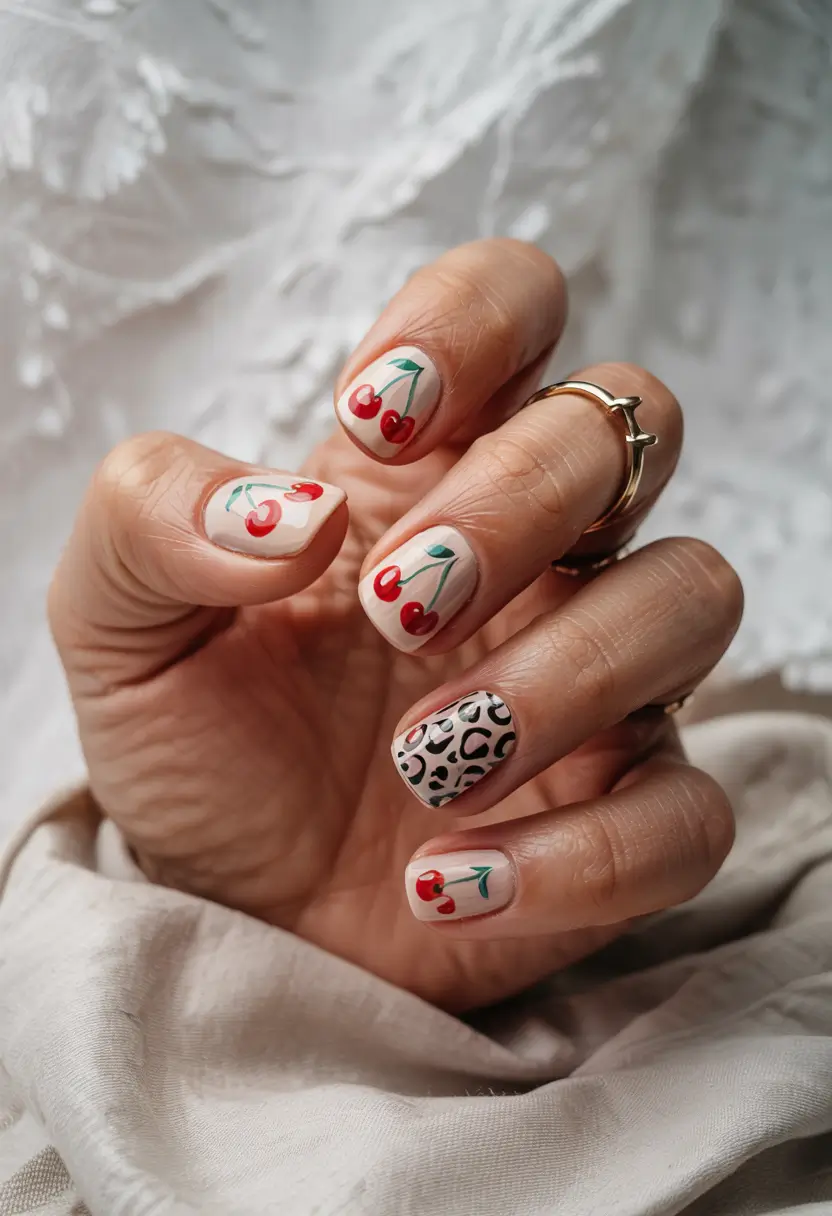
As a base, I also suggest Olive & June’s “GH” or Essie’s “Ballet Slippers.” For the leopard detail, feel free to use water decals or paint with black and taupe polish and a detail brush. Use a tiny dotting tool for the cherres with a vibrant red polish like Orly “Red Flare” and add delicate green stems.
If you decide to do it yourself, start by cleaning, filing, and shaping your nails into short squares or simple squovals. Apply the nude base, then dot on the cherries and draw on stems. Make sure not to think too much about placement—it’s meant to be random and that’s cute. Use uneven blobs and broken circles for the leopard print too. Finish with a glossy top coat to achieve the coveted juicy look.
The first thing that comes to mind this manicure is the cherry picking trip I took last summer with friends—sunhats, iced coffee, and sticky fingers. It’s a simple design yet it feels perfectly planned, making it ideal for anyone who prefers not to wear bright colors, but still wants to have a bit of fun.
Mermaid Net on Tropical Turquoise
These are the types of nails that adorn your fingertips and entice attention the instant you disembark from the flight. The bright turquoise base with a netted white design is reminiscent of the ocean—without reaching full costume. Sprinkle some glitter purple over it, and suddenly you have a full mermaid-core moment on your nails. This style embodies both fun gel and vacation boldness.
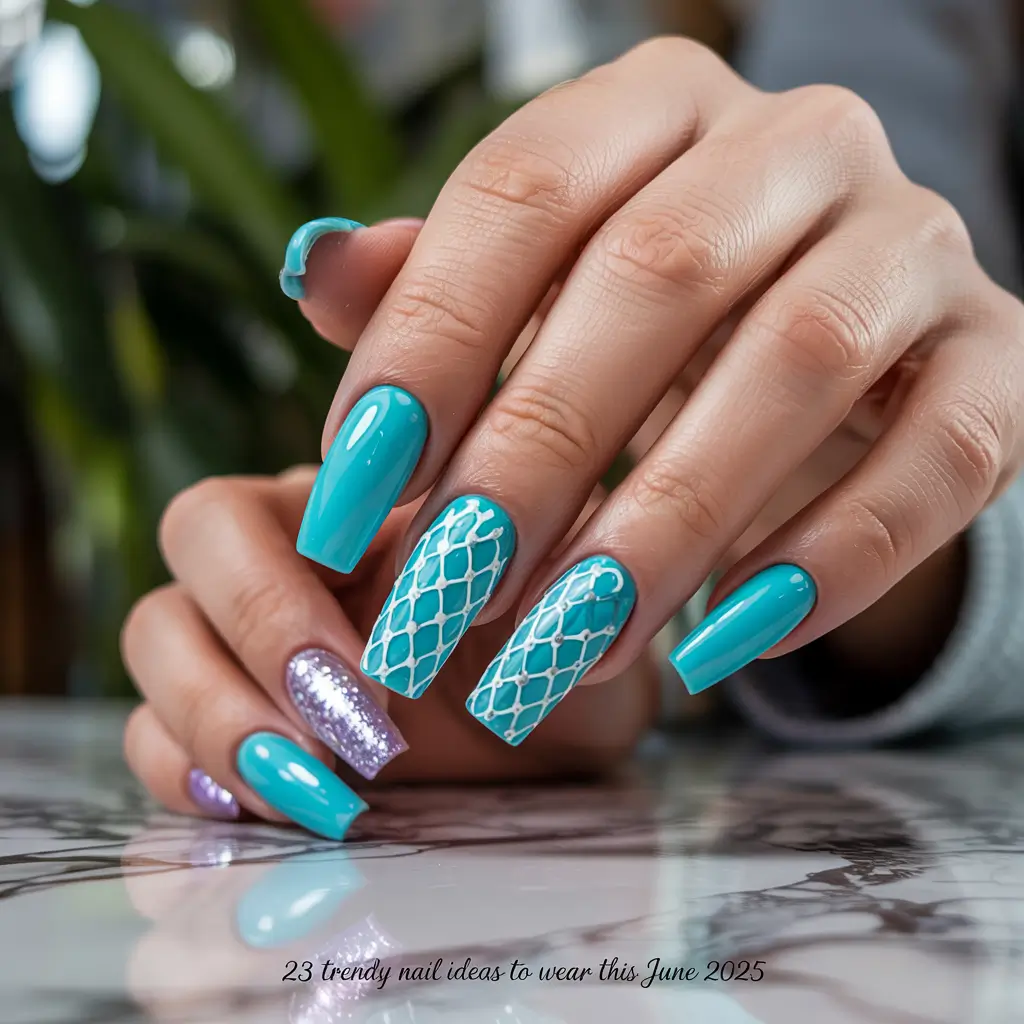
I personally use Gelish “Seafoam” or OPI “Teal Me More” for the main shade, paired with Color Club’s lavender glitter for the accents. The netting can either be achieved with a stamping plate or done freehand with thin white gel and a striping brush.
Start off with the turquoise base and cure. Then, go to the accent nails. For those stamping, cover the plate with white gel and press down quickly. For those drawing, create diagonal lines and then weave them again for a fishnet effect. Use a thick top coat to seal everything and avoid snagging issues.
If you’ve wanted to channel your inner Ariel with whimsical mermaid nails, then this design is for you. The look is a compliment magnet, timing perfectly with warm waves and ananklet. Yes, I crafted the entire outfit as an accessory to my nails.
Sunset Cocktail Hour Art
Each nail encapsulates an entire vacation, truly bottle mood a designed with vivid cocktails, pineapples, and palm leaves paints, set against blue skies. Sipping on a tropical drink with a tiny umbrella, whie palms do-ing the heavy personification. Unlike fashion, this is be colorful, maxilist and unapologetically joyful. Essentially a beach party in the form of ten fingers.
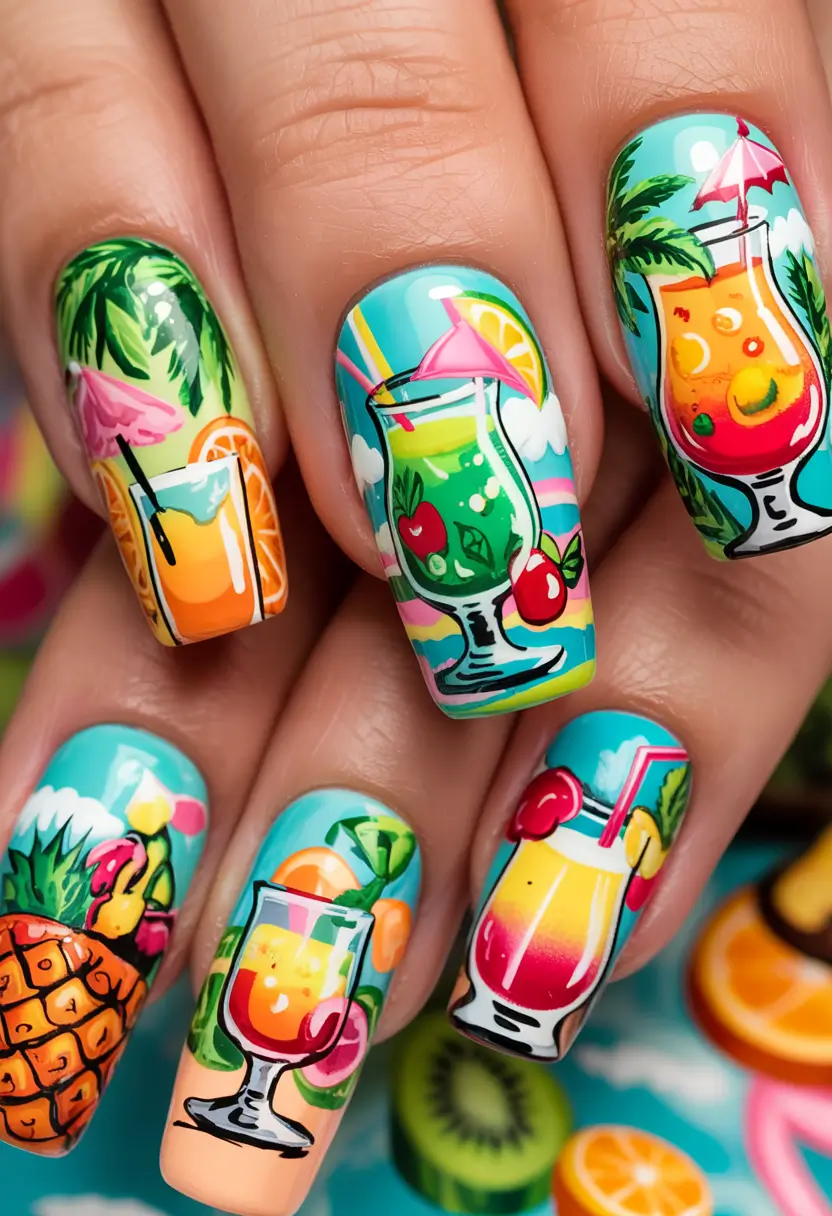
To achieve this level, you need ultra detailed decals with pigment gel. Start with turquoise bases like “Beach Bliss” with Beetles, layering as self drawn characters with dotting tools and fine brush pens. Incorporate with nail art Carnival using neglected gel Infinity slices, mint leaves and even more vibrant fruits.
Unless you’re a professional, this is something better tackled by an expert. However, if you are bold and steady, take your time with the design. What I love is how the glass and fruit elements shine so vividly with a thick no-wipe glossy top coat.
For a pool day, these got me texting my best friend: “We need a tropical vacay. Stat.” These nails are full of conversation of their own and they also act as an accessory for your outfit while lifting your mood.
Sunset Palms and Sky
Delicate black palm prints juxtaposed coral and peach, giving off soft gradients with the perfect angle to say: “golden hour on the beach.” For a vacation manicure, this one certainly fulfills the brief. Romantic, warm, and theatrical all at once. The palms are also very much a jet-lag-free getaway vibe, stretching across your fingers. Grab this polish if you wish to wear nails that are reminiscent of sunset postcards.
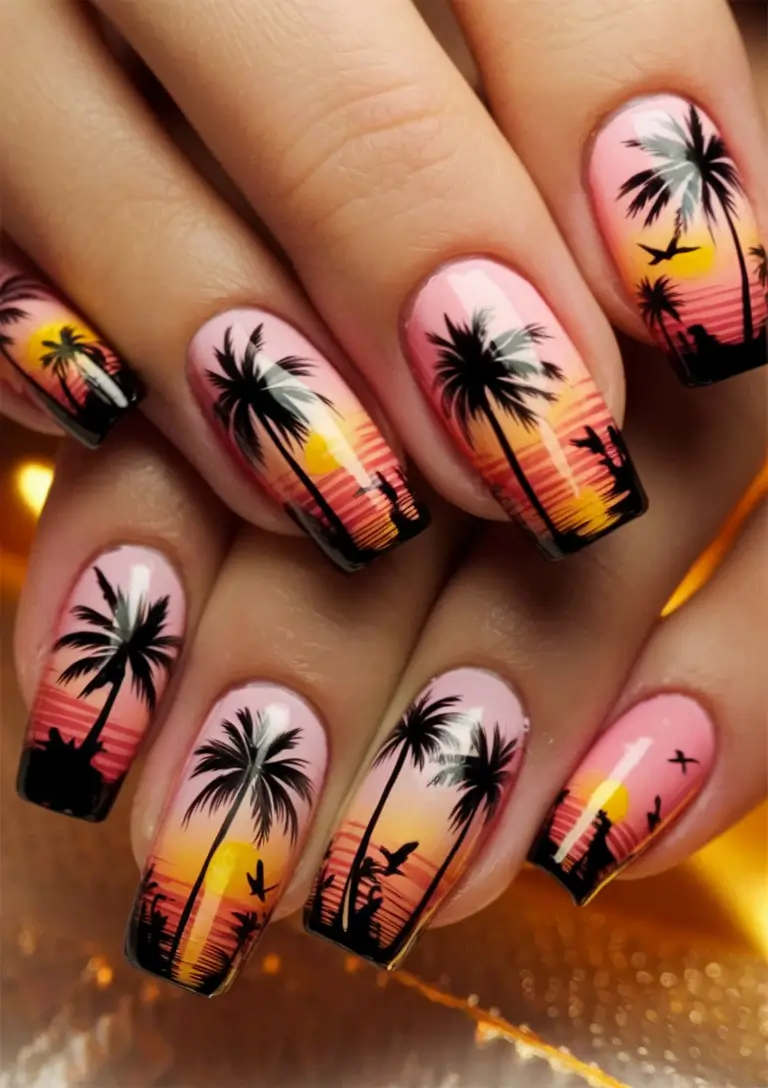
For the nails, you can start with an ombré style sponge gradient featuring “Tart Deco” by Essie or “She’s a Bad Muffuletta” by OPI. After curing the layer of nail paint, the black palm silhouettes could be hand painted with high-pigment gel polish or if you wish to be more tidy, they could be applied using stamp plates.
Make sure to spend some time blending the gradient on each nail with a sponge and ensure to cure every layer before palm trees are painted or stamped. For the trees too, don’t go overboard and use a maximum of two palms per nail which provides a nice amount of balance. Apply a glossy finishing coat and you’re done.
The look never gets old in my opinion. It takes me back to Kauai where sunsets during my stay featured a soft peach tone. It is nostalgic, a touch flirty, and very stunning.
Escape with Mini Beach Scene
Zooming into the nails, one can see sailboats cruising animatedly through turquoise waters, and little palm trees sway in the tiny sand islands. Every nail depicts a story which could either be sailing past a silent island or watching the tide come in. This is a campy vacation on your hands with the only requirement being to look fabulous, a passport is not needed.
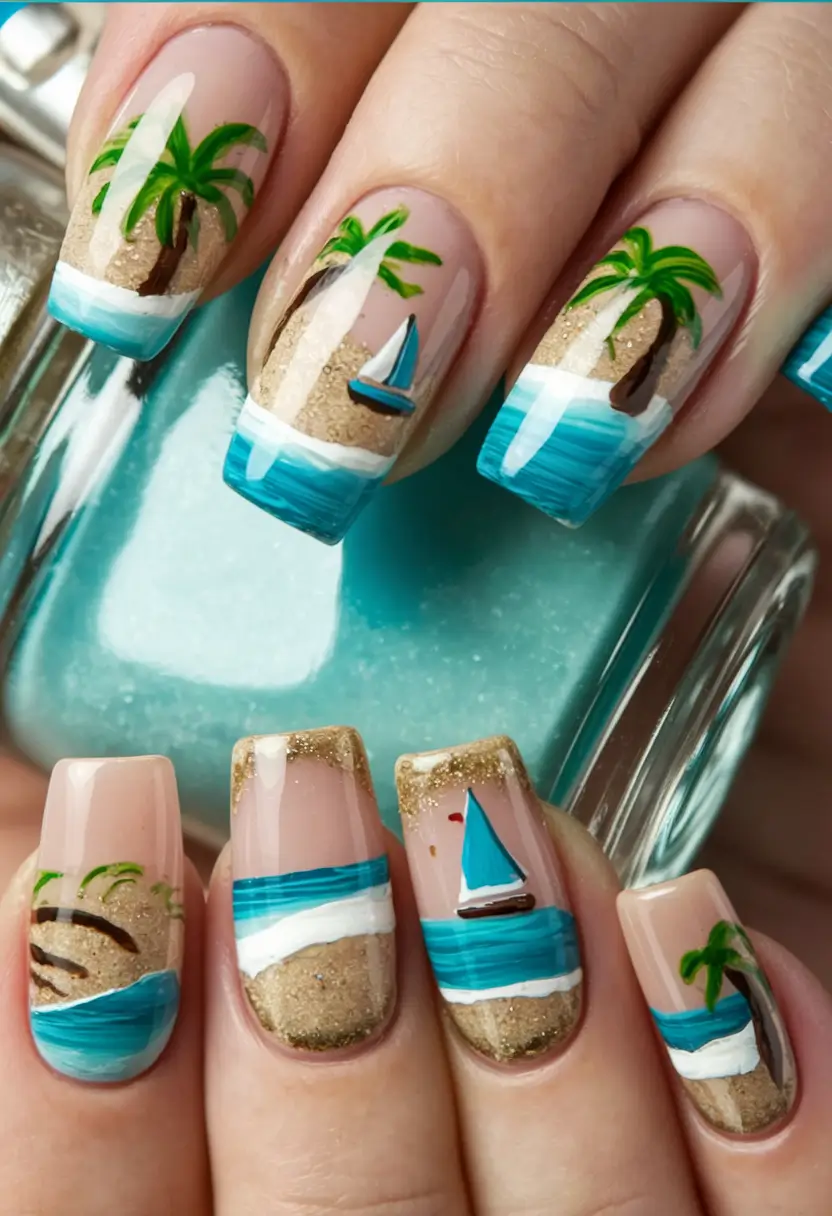
The blue elements can be painted with a highly saturated polish like “Blue Me Away” by Madam Glam. To add more depth and sculptural dimension, real sand can be used along with high pigmented polish for the blue water. Palm trees can be drawn using Nail Art Liner Brushes with gel paint in green and brown. Sprinkle in gold glitter dust to mimic sunlit flecks on a beach before curing to add to the sculpted effect.
This design is not something that can be completed in a hurry. Dotting tools can be used for the palm elements and boats, while ultra-fine brushes can create trunks and leaves. Well known nail artist Mei Kawajiri states this design proves how adding different layers changes texture and adds a realistic touch.
I had something similar done for a cruise last summer and to be honest, the nails were a conversation starter at every single bar. This style is relaxing yet intricate to the extent that it feels luxurious. You will be inclined to admire your fingers throughout the day.
Sage Green Garden Vibes
This design speaks to soft souls and nature lovers. A perfect combination of sage green matte and a nude base, intertwined with tender white and leafy flowers. It is zen, feminine, chic in excess–great if you want something clean and green and refreshing this summer.
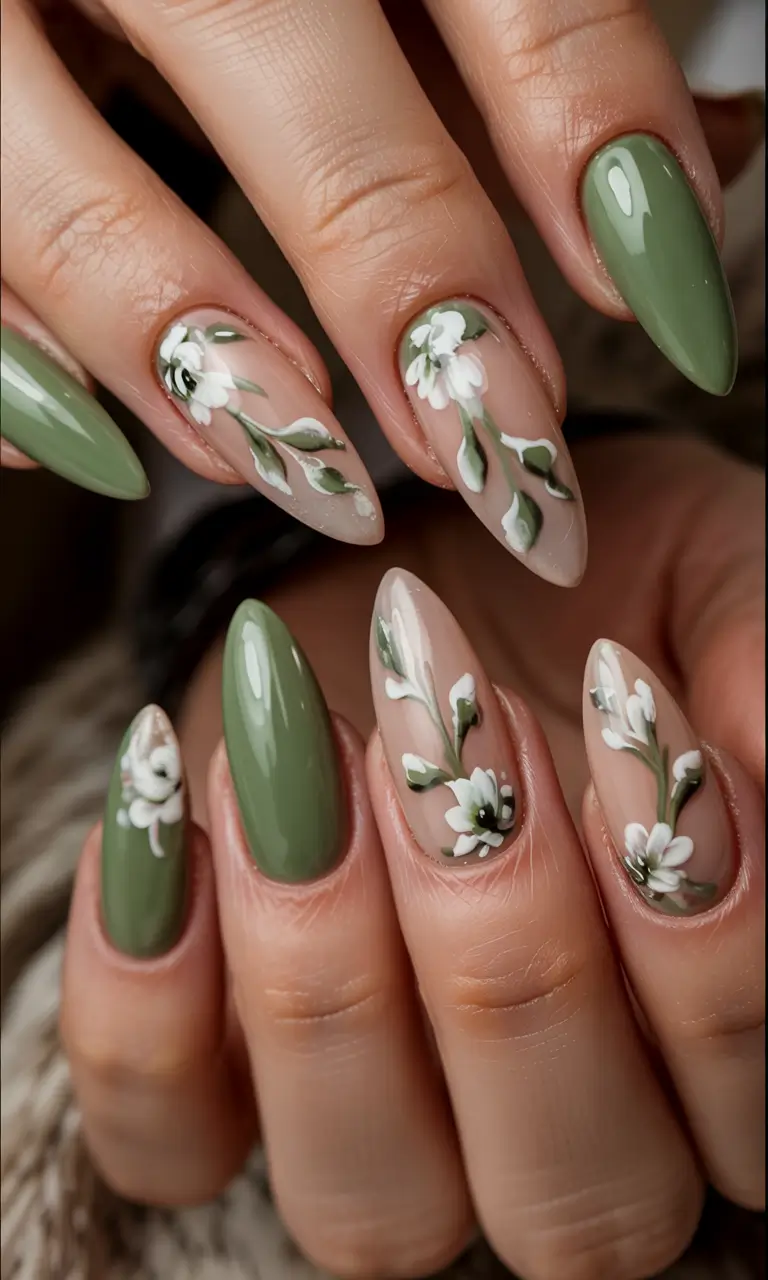
I used OPI “This Isn’t Greenland” and a neutral jelly base. The flowers? Paintable with a white gel via pen or brush like the Nail Art Factory Detailer #000. It looks flattering on acrylics and short almonds and peak matte top coats blur the look so elegantly.
Once you prep the nails, start with applying a solid and sheer base, alternating between the two. After curing, use short brush strokes to create the stems and petals. Add tiny white dots to accent the petals and finish with top coat. Nail pro Betina Goldstein often uses sheer and matte finishes layered on top of each other for softness, and here it absolutely works.
I wore this exact palette for attending a garden wedding and received endless compliments. It was subtle enough to balance gold jewelry and a flowy dress. This look is soft, never boring, and certainly not basic.
Short Forest Blossoms
A short, simple nail look done well is always a breath of fresh air and these nails do just that, offering a strong dose of forest-core vibe. The forest-core aesthetics are captured with a dark, almost jade green base sprinkled with pink blossoms. This manicure is a chic polish to have while wearing a tee and jeans but still looks vacation ready.
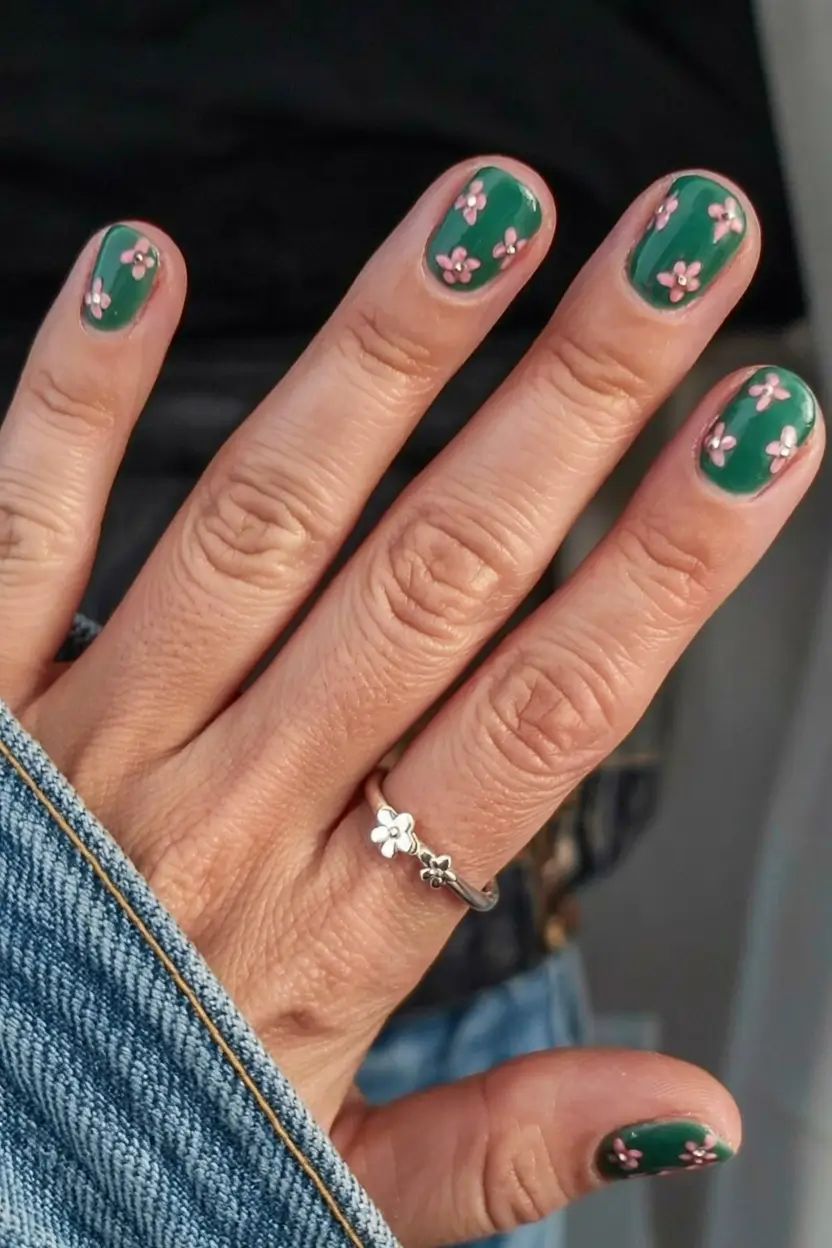
For the base, I like to use Cirque Colors “Storm King” or Lights Lacquer “Green with Envy.” The floral accents can be easily made with a dotting tool and pastel pink and white. To add sparkle, a gold or silver micro bead can be added to the center.
It’s as simple as putting on the base coat, letting it cure, and using a dotting tool to create a circle of five dots. After placing a bead in the center or adding a metallic dot, just seal with a top coat and you are done.
I love wearing these to the mountains or on a cabin getaway. They are minimalist yet packed with charm and go perfectly with an oat milk latte and silver rings.
3D Sea Turtle Fantasy
These are vivid showstoppers, featuring brilliant green hues, shell-like textures, and an adorable 3D turtle that appears to have swum straight out of a reef. Fun gel doesn’t even start to cover it; the design incorporates artistry and storytelling as if you recently went snorkeling and somehow ended up with the ocean on your fingertips.
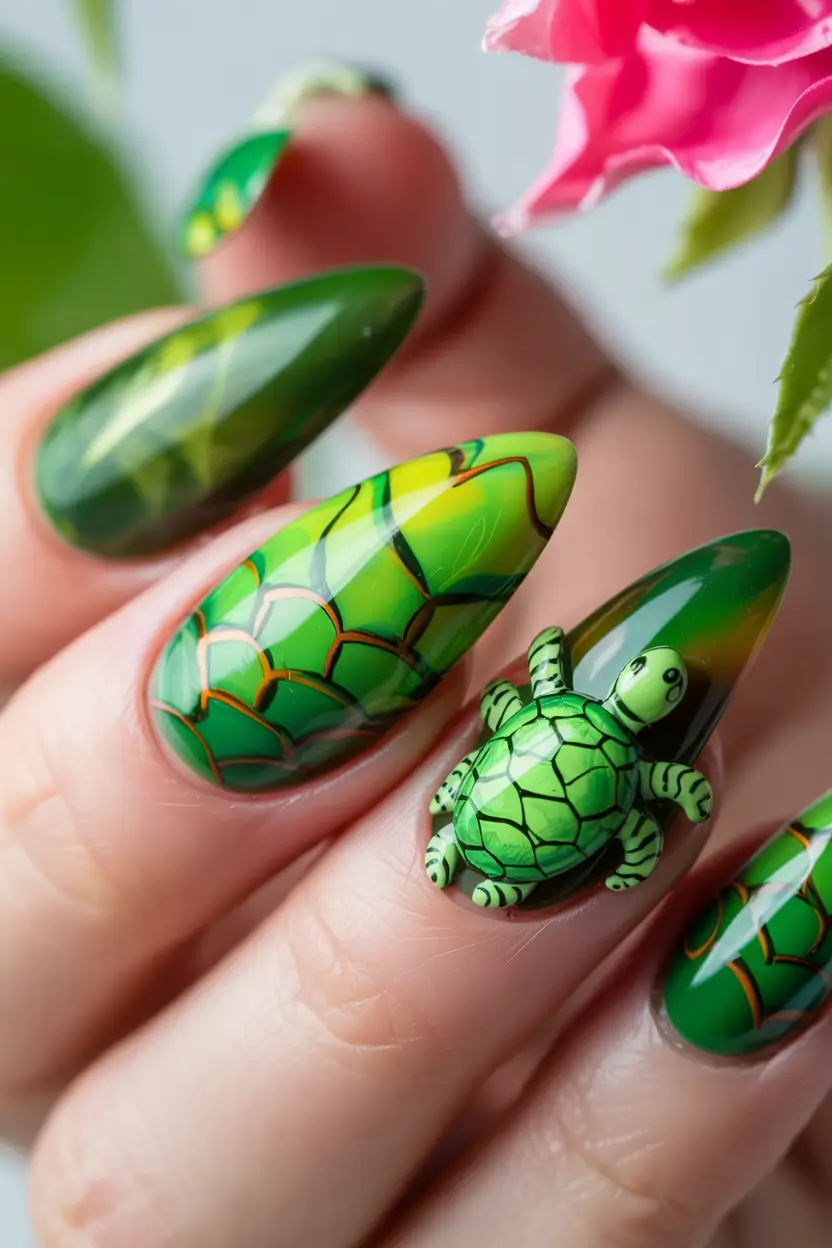
For the look to really pop, you will need to have a combination of green gels like Leafgel’s #130, #142, and #151. To achieve the turtle basking in the sea effect, sculpt the shell with clear builder gel, cure, and then paint using classic nail paints and a micro brush. To top it off, go chrome on the outlines, and then gradient on the base for an added wow factor.
Getting a design like this done would take some time as it is absolutely salon worthy. Start with a gradient base, then slice copper outlines for the shell segments and sculpt 3D layers with builder gel. Assemble the sculpted body of the turtle before painting details and applying the top coat. Finish with the body detailing and top coat.
As soon as I saw something like this on Pinterest, I jumped at the chance to book an appointment. It’s the type of manicure that turns heads with the most common reaction of “Wait, is that a turtle?!” in the best way. Striking, unique and exactly what you need for a tropical vacation or pretending to be on one.
Neon Pink 2025 Summer French Remix
Sporting a ‘tropical smoothie’ has now been made easy. It features vivid pink which meets with leafy green, in a diagonal French twist, which rheostats with an adorable 3D flower and rhinestone. Luxury has been combined with the ‘Tropical Chique’ style of Summer fashion. The stylist mentality over here has aesthetically tuned “I’m summer ready, but also love to be editorial chic.”
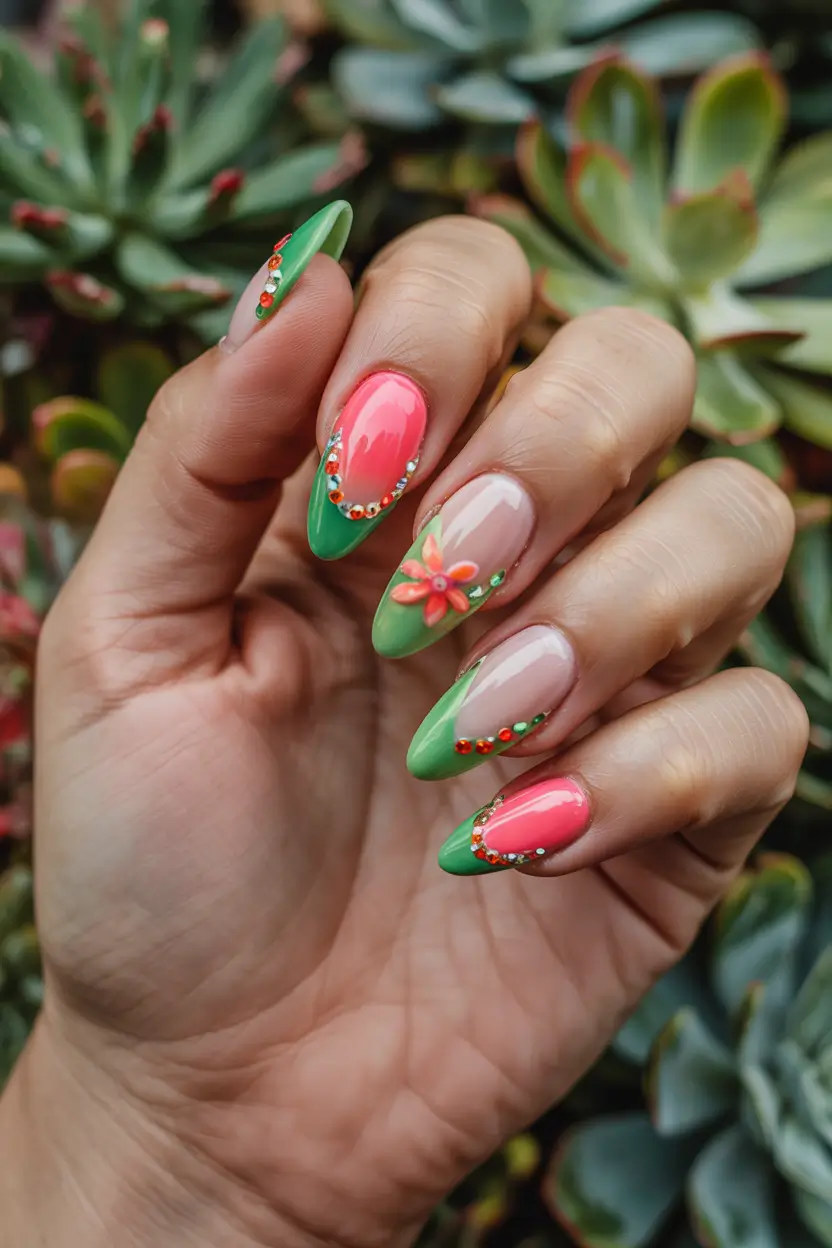
Consider combining The GelBottle’s “Candy” and “Jungle” for the color split and paired with Born Pretty or Swarovski rhinestones. The floral accent can either be soft acrylic petals or 3D gel molds. These petite blooms can be shaped perfectly by applying with a pinch tool to hold while the gel sets.
Undoubtedly looks gorgeous on short almond or acrylic nails. Post base color, the French tips can be added by creating the diagonal sections with tape, or freehand using a detail brush. Rhinestones can be added along the cured gel edges while the flower can be pressed into gel for a soft hold and sealed gentle for durability.
I wore this during a trip to the desert last year, and it paired nicely with gold earrings and sleek hair. It emanates much more than confidence, it radiates daring self-assurity. Winning nail art that doesn’t require permission to daunt.
Watermelon Decoration with Juicy Red Base
It’s how the watermelon slice details dance with the cherry red polish that makes this nail design feel so fresh. The base is drenched in glossy red gel, and the transparent nails splash on playful watermelon motifs painted in green and dotted with black. It captures a carefree vibe reminiscent of childhood poolside popsicles, evoking joy and nostalgia at the same time.
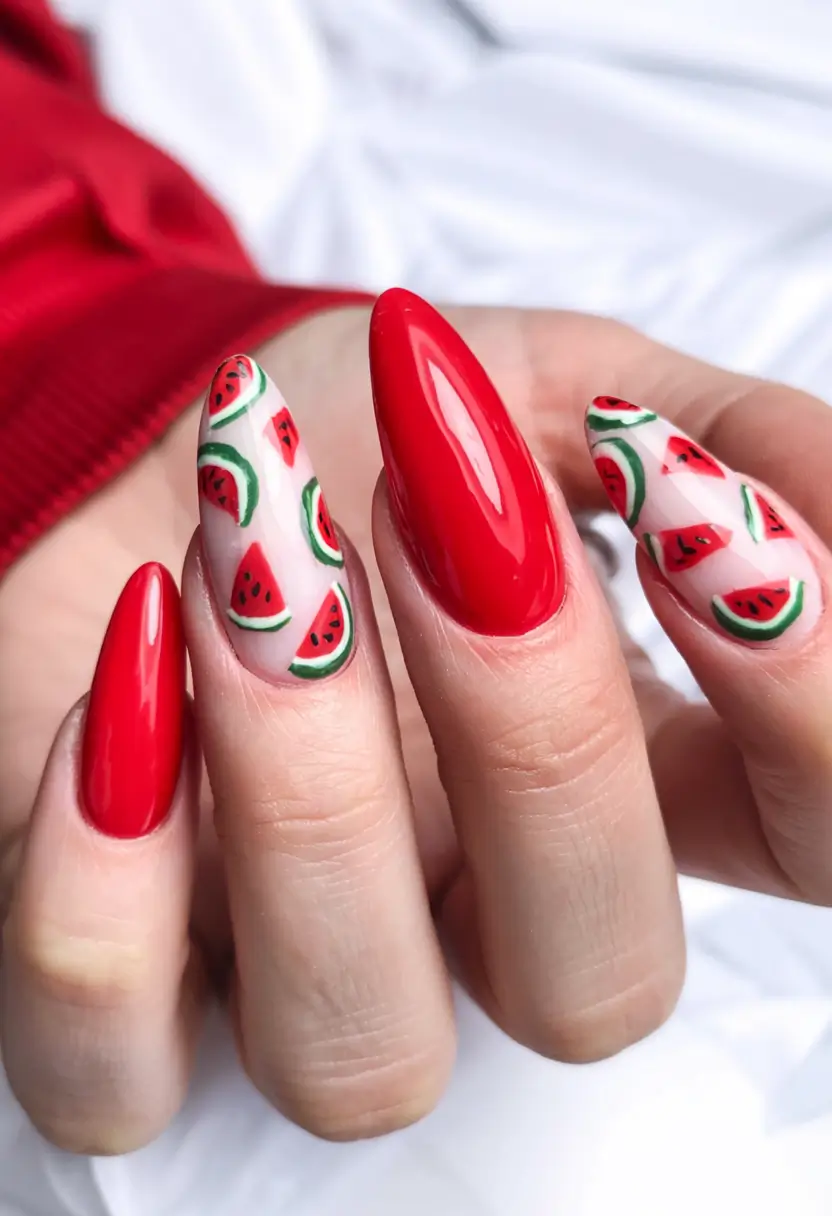
For achieving this look, I’d recommend OPI’s Big Apple Red for a reliable cherry red and a thin detail brush. Shine, glassy nails require a gel topcoat, so make sure to use that as well. For the watermelon details, a sheer base coat like Essie’s Mademoiselle works marvelously, then the details can be painted on with green, white, and black gel.
A good tip that sticks to mind is from nail artist Mazz Hanna, who works with celebrities like Julia Roberts. She advises to always let the base coat cure fully before adding details. “A sticky surface makes the lines fuzz out,” is how she summarized it in a summer nail piece for Allure. That would be a good rule to follow if you love precision.
I knew it would be a showstopper for my best friend’s bachelorette party in Key West and people literally stopped us on the streets. It is quintessentially bold, colorful, and perfect for a getaway.
Kiwi Realness and Glossy Greens
This creation is electrifying. Pop art comes to mind on first glance, especially with the alternating slices of kiwis and solid green and red glossy nails. The kiwi art is extreme in its realism; the gradient, seedy texture, and soft lime shimmer on the tips. It’s the best description of fruitcore for adults and it embodies a beachside getaway from every angle.
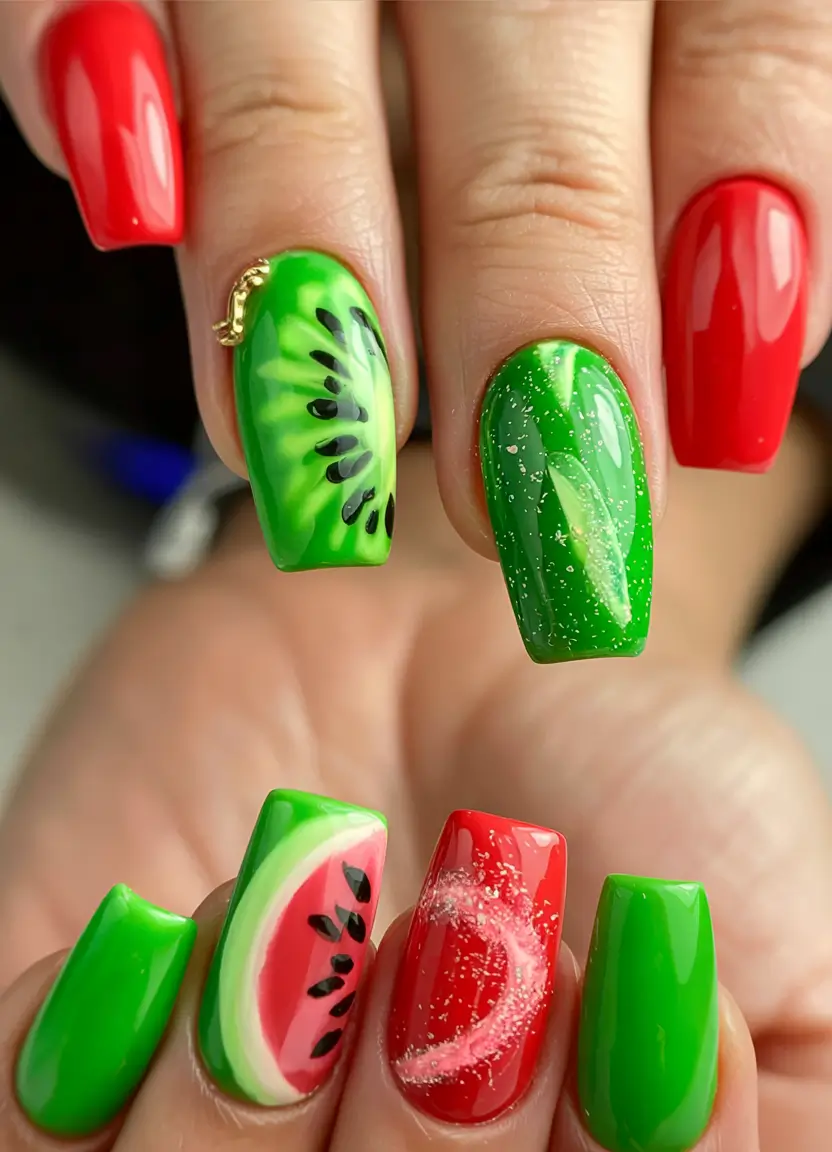
You will need some beetles “Electric Lime” polish for neon green and glossy nails, gel polish, black dotting tools, and white for the base of the fruit design. The look wears best when a fleck of loose shimmer is added or sparkle powder, giving that wet summer fruit shine.
For shape, start with a clear acrylic layer or polish for durability, then square up before color. Tom Bachik has great tips on natural polish shading, recommending a gentle green sponging from the center out that resembles kiwi skin.
Would I wear this for work on a Tuesday? I don’t think so, but these nails would be perfect for a girl’s trip to Miami. They are a whole mood on their own.
Whimsical Pastel Kitty Parade
This set is soft and sweet, with a hint of unexpected expression. The translucent nude base holds tiny cat faces in pastel hues that create a whimsical, fairy tale finish to this manicure. The unique expressive yet cohesive faces on each nail feel like your fingertips are having a conversation. Beyond cute? Magnificently.
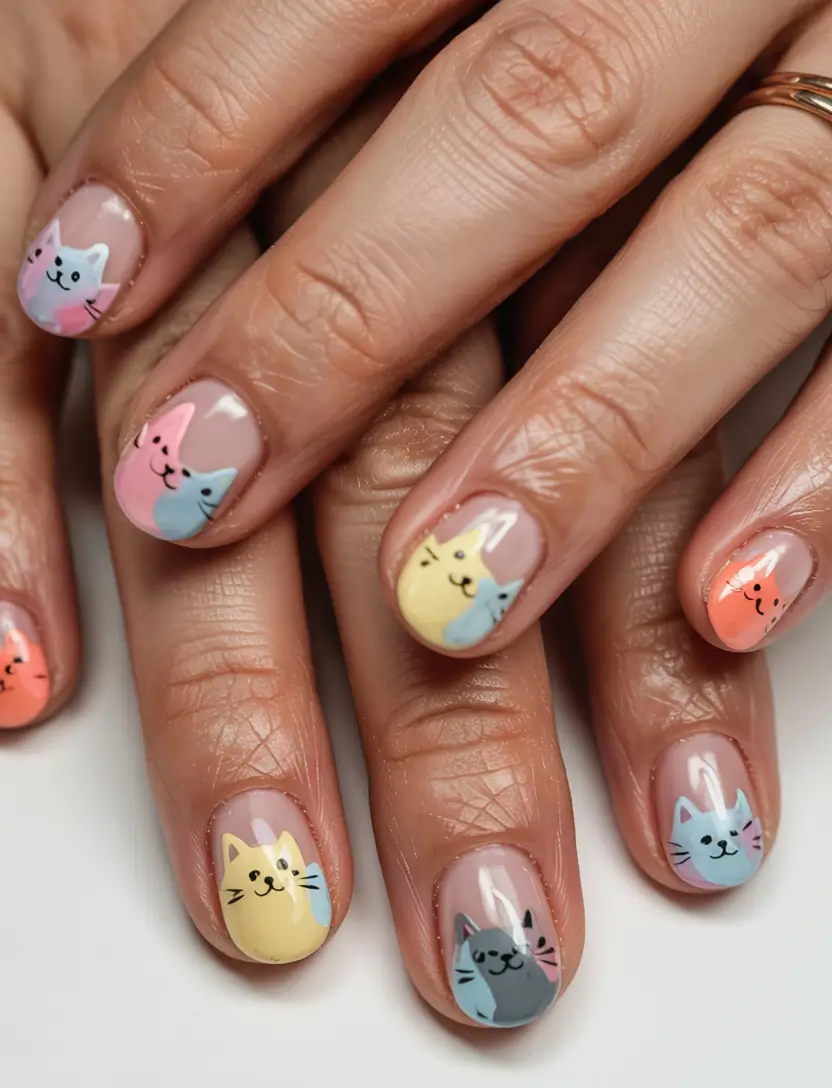
For this design, you’ll first want to check out Peacci and Lights Lacquer for soft pastel gel paints, among others. A fine tip gel liner is perfect for drawing the eyes and whiskers. The overall balanced and clean look is maintained with a simple squoval nail shape.
For the smiles, a steady hand and dotting tools for the eyes will work best. This at-home mani is best done at a slow pace, but trust me, it is absolutely worth the effort. This is the purr-fect design for cat moms (or rather, your inner kitty in nail form).
Last year, I went on a road trip to Carmel-by-the-Sea, where I wore a similar nail set. The number of compliments I received from baristas and boutique owners was insane.
Psychedelic Swirls in Sunset Pastels
This look is reminiscent of a dreamy day at Venice Beach with pink, mint, and aqua swirls flowing like saltwater taffy. These gel nails blend modern and retro styles with bold colors and clean almond shapes. Overall, the vibe is lighthearted, but make it fashion. Picture early morning surfing meets cotton candy-streaked skies.
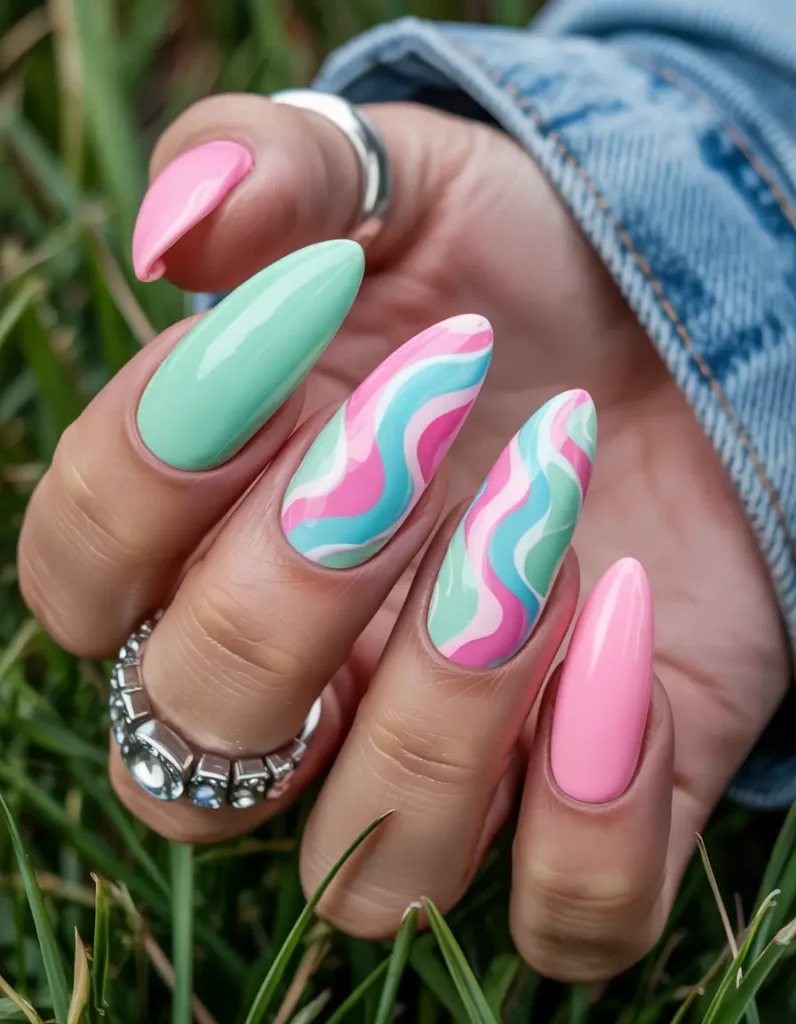
The swirl design is simpler than it appears to be. Just drag a fine striping brush through wet layers of polish. I used The GelBottle Inc in “Elfie,” “Dollface,” and “Frosting.” Together, they create a beautiful blend.
For beginners, I suggest curing in between swirl passes. Always finish with a high-gloss topcoat. As per Vogue Beauty, “swirl manicures have a vacation state of mind” and rightfully so.
Those colors instantly remind me of packing a denim jacket and heading for the coast, which is why I will book this for my next extended weekend trip.
Sprinkle Explosion for the Sweet Tooth
These nails look an explosion from a donut shop, don’t they? The vivid hues of sprinkles with pink and nude base is unapologetically bright and fun. The design is playful, but still polished, so it doesn’t look like a completely whimsical design. It is a playful trendy statement.
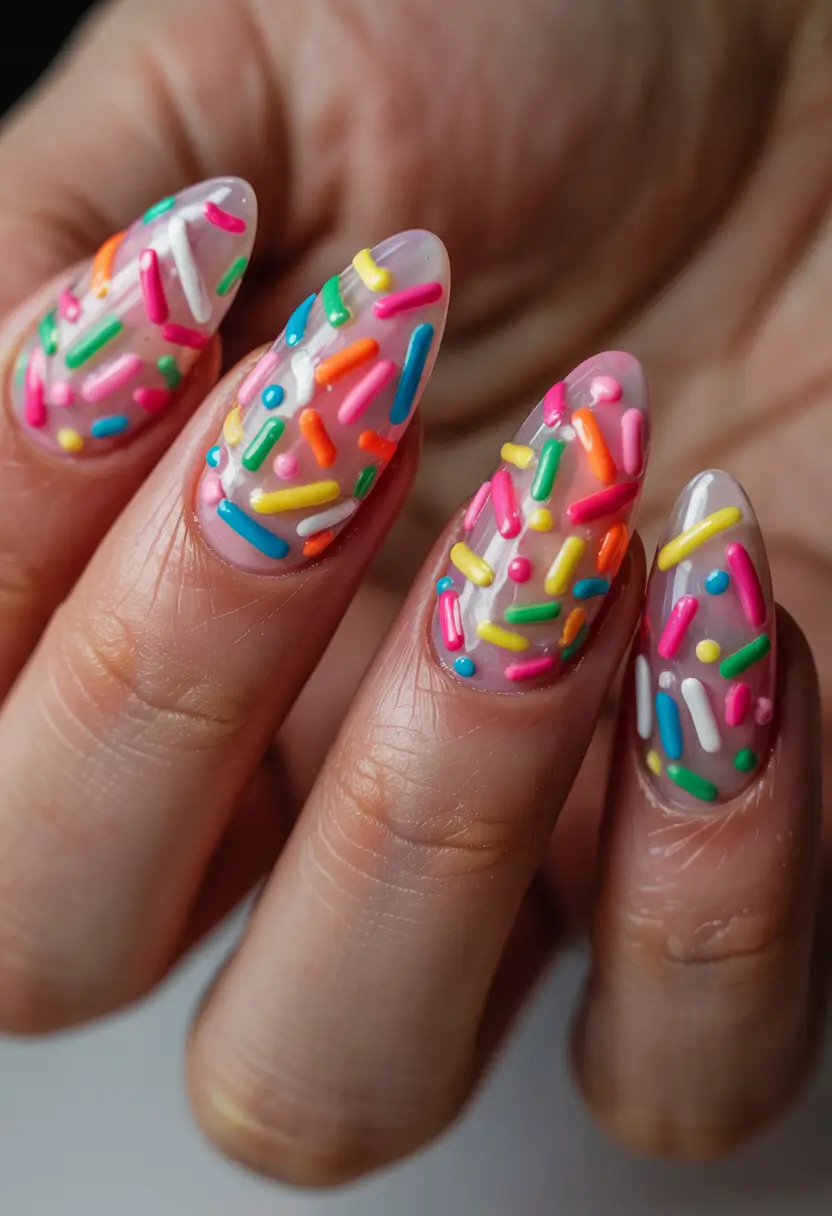
To achieve the 3D effect, nails have embedded tiny acrylic sprinkles and therefore not just a simple polish coat. You can get sprinkle decals from shops, or make your own by using a thick gel paint and dotting tool.
These claws come with joyous vibes and fun,- so I recommend them for piña colada vacations with no work on the to-do list. If your plans involve loads of typing, you’d be better off with something more pragmatic.
During her birthday brunch in Palm Springs, my friend wore these and to everyone’s surprise, the nails became the unofficial party theme! Such is the magic of bold nails.
Poolside Mayhem and Neon Safari
What would nails look like if a rave party fused with a wildlife safari? This is precisely what the nails would look like. The design is a potent concoction of wild animal stripes and neon colors: a dazzling graphic riot of orange, green, pink, and electric blue. This isn’t a timid look — it’s drama on vacation and unapologetic Fiji fun. The contrasting stripes evoke tiger print but through street art’s blank canvas.
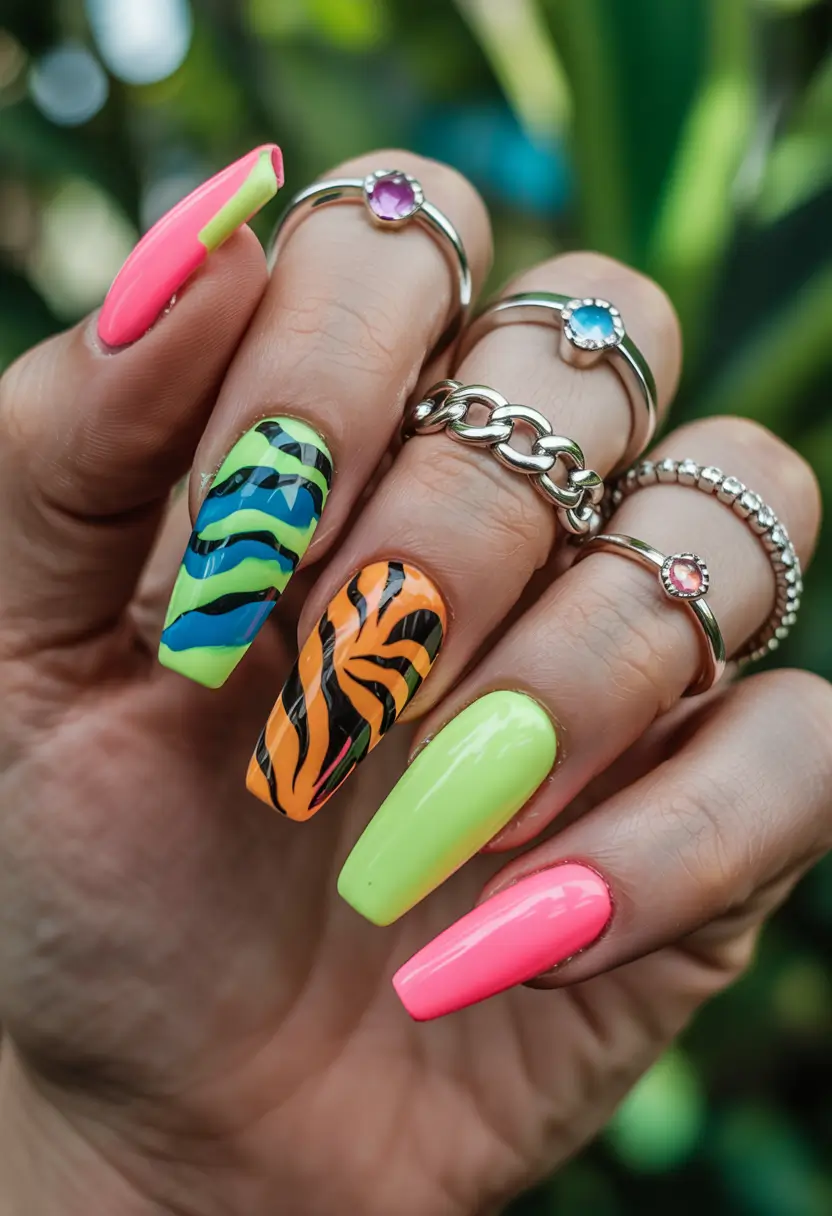
For this, I’d choose “Artistic Colour Revolution” neon collection. Their pigment payoff is unreal. For the black accents, use a fine striping brush with Young Nails “Mission Control” black gel paint. You will have control for those crisp line details.
To all doing this at home, I recommend block outlining your base colors first and curing them before adding the animal print. One nail at a time. Naomi Yasuda, the celebrity nail technician, once remarked “working too fast with neons can muddy the design.” That applies so well here.
These are the styles of acrylic nails I would opt for, whether it is attending a music festival in the desert or just for those days when I want my manicure to shine.
Playful Garden Party Pop
These nails are equally a cheerful mixture of flower elect and delight – as if she is relaxing with something fruity in a field of daisies. Every nail has a coat of bold 3D flowers lilting atop a coral, green, pink, or teal base. While the square shape keeps it grounded, the blossoms add a tactile whimsy. It’s bottled sunshine. Preserved summer.
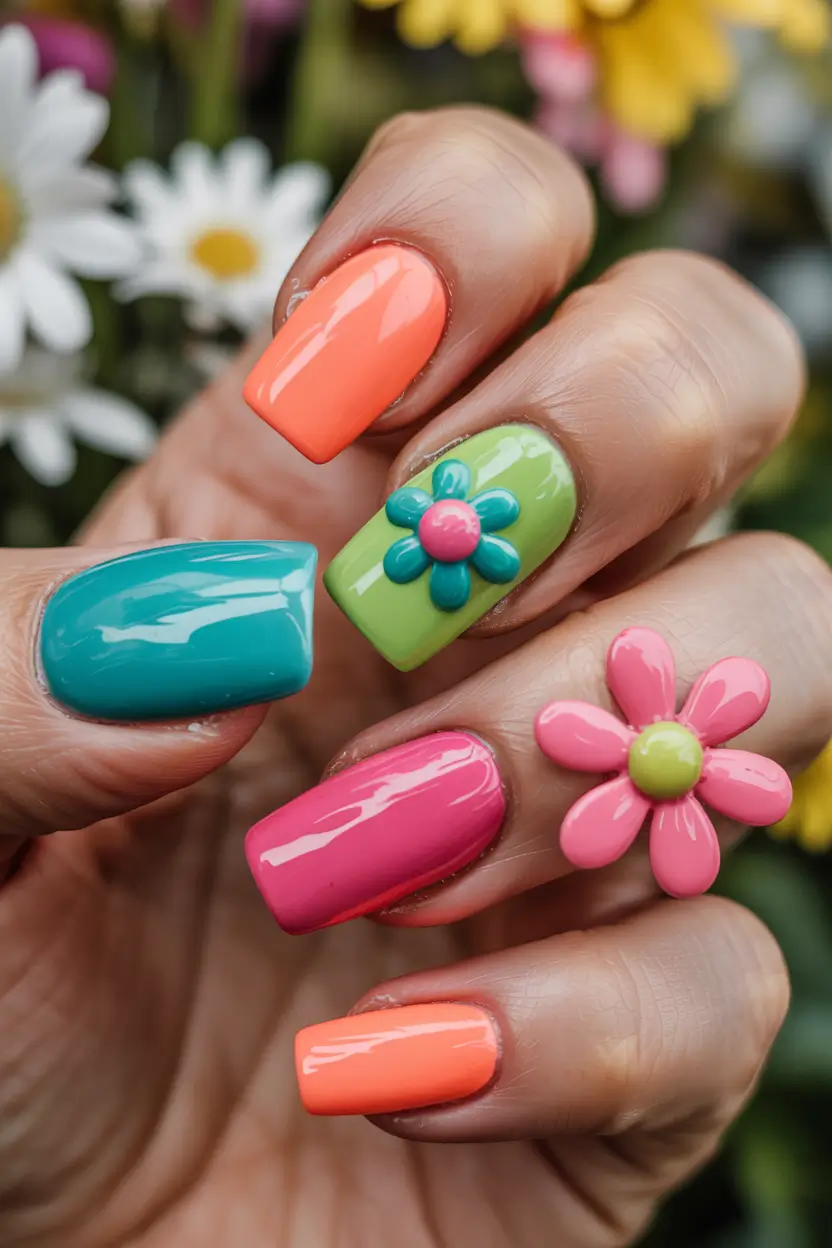
You’ll want vibrant shades like DND’s “Tropical Punch” and “Key Lime Pie,” plus 3D nail flower charms or builder gel to mold your own. If you’re flooing it yourself, nail glue or a UV hard gel will be crucial to securely fasten the flowers.
To me, this screams a vacation beach blush moment or brunch in bloom. DIY gel nails, I’d cure a gel base, use dotting tools and pastel builder gels or sculpt each petal, then seal with glossy top coat.
To be honest, these nails remind me of stickers from my childhood, and I mean that in the best way possible. They feel like joy, blissed out, fully smoothed over.
Opalescent Galaxy Glow
This style is staring into a gemstone under a disco ball. An ethereal veil of chrome encases shimmering flakes, transforming each nail into a glowing amethyst, golden, aqua, or emerald. The shape, a gentle almond taper, adds a sleek profile. This look screams futuristic fairy while whispering mermaid core. Total vacation-ready nails for summer 2025 energy if you are into elevated sparkle.
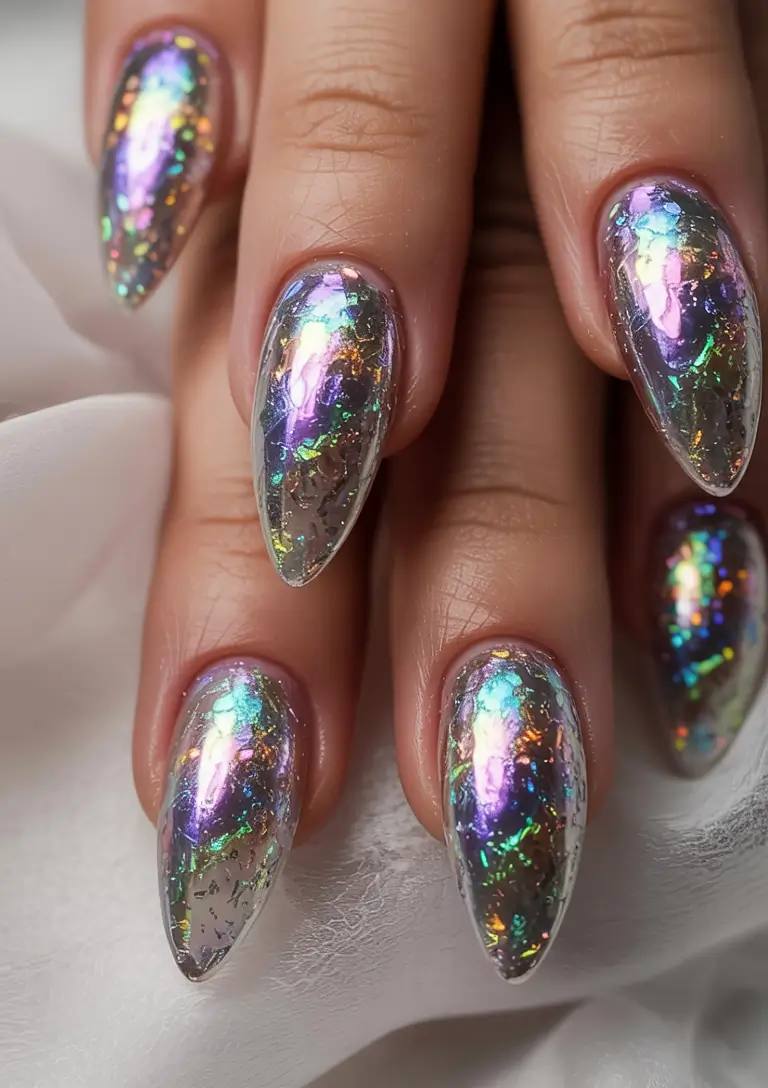
To recreate it, I’d use Born Pretty’s foil flakes set and clear iridescent gel for the overlay. Everything looks magical when layered. The best results derive from starting with a sheer purple or pink base, adding your foil, and sealing it with a jelly top coat.
Mei Kawajiri, a notable celebrity manicurist, has been known to use “glass marble” techniques. To achieve this effect, she applies a non-wipe chrome top coat. I wonder how she gets nails to shimmer from spade with that technique.
These nails evoke “spa day on a spaceship,” a vibe I’m fully onboard with for summer 2025. They feel definitely fashionable, but in that next-gen way.
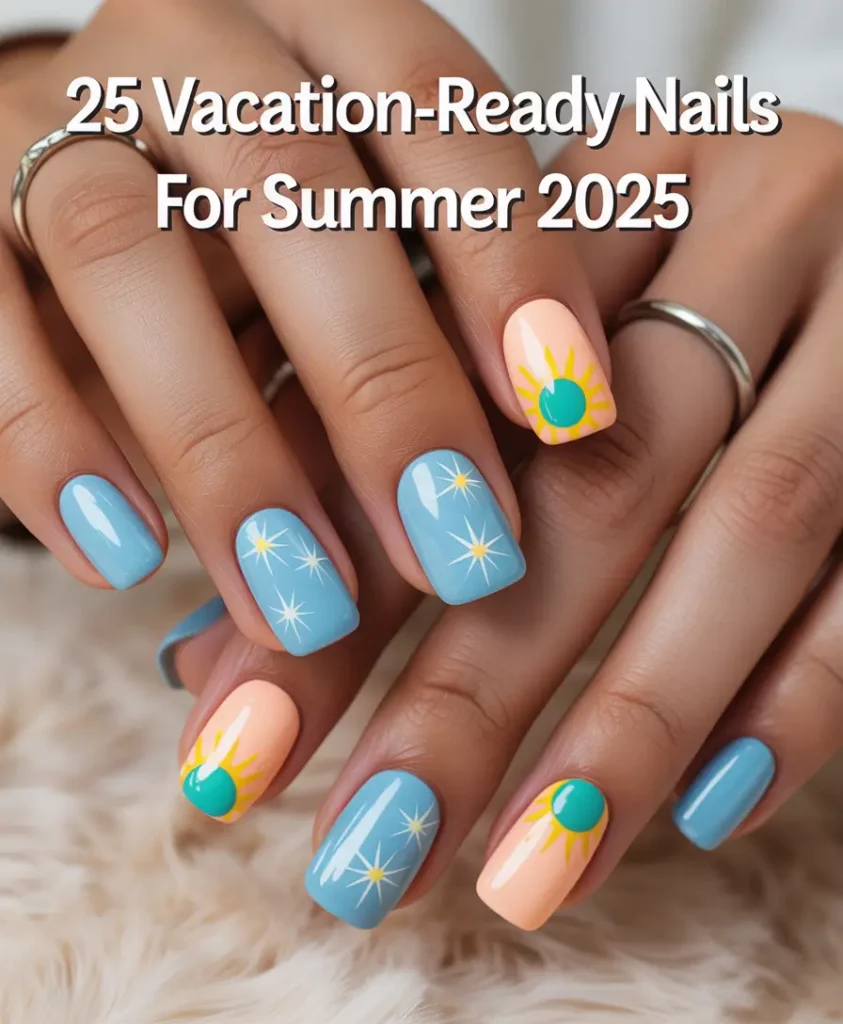
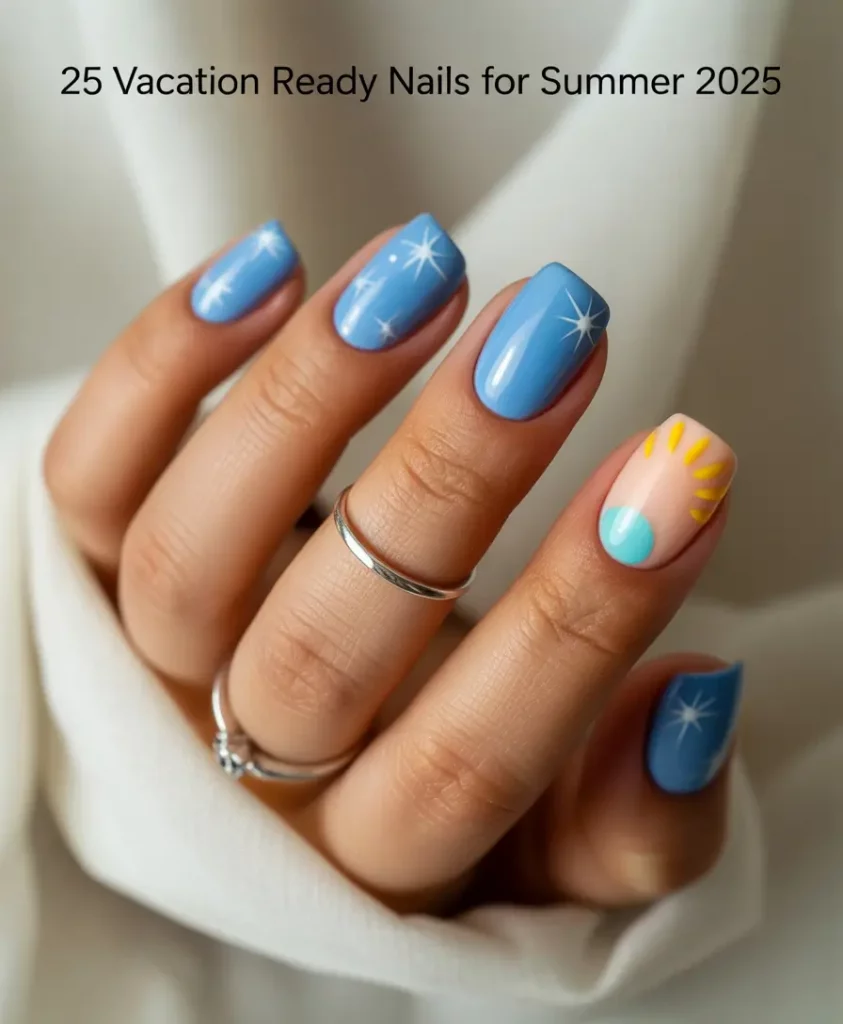
Blues from the Pool & Sun-Kissed Skies
The light and clean touch of sky blue with a peachy bare pink are paired with tiny suns and white bursts on focus nails, creating a perfect blend of vacation beach vibes and the dreamiest mani. Short square shapes are modern as well as practical which is a big plus.
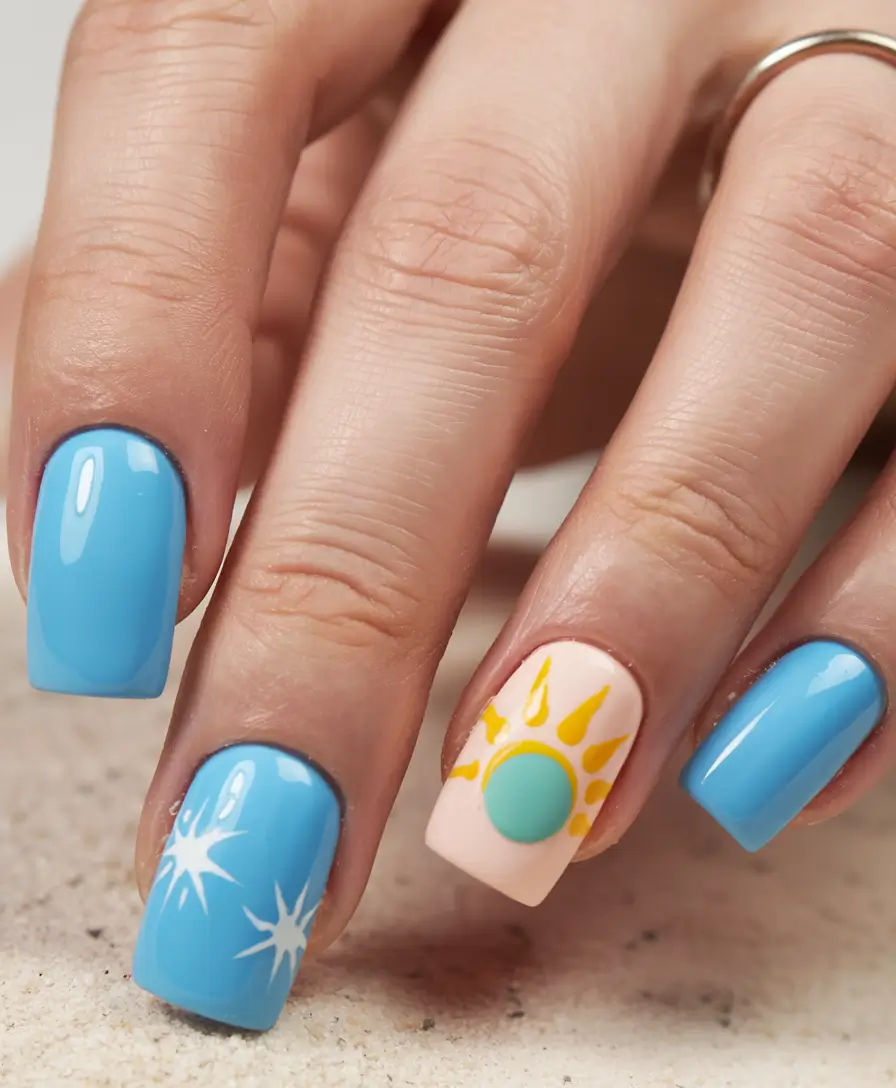
With a bright yellow dot as the sun, I would grab “Like Rain” and “Soft Focus” by Paintbox for the rest of the design. The blue dot serves as a 3D gel embellishment which is incredibly easy to put on using a dotting tool.
In my experience, applying a ridge-filling base coat enhances your look by generating a smoother finish. This not only lets color stand out but also gives a boost for those keeping nails short and perfect.
This is the kind of mani I would go for on a trip to the Amalfi Coast. It gives off an expensive vibe, minimal and playful while still low-effort and high impact.
Whether taking a trip to an actual island or checking out mentally while sitting under a ceiling fan, nails can provide the entire island vibe. These designs come in simple and extra, short square or sculpted acrylic, offering a one-way ticket to self-expression under the sun. Pick one that suits your energy for the day, destination, or favorite drink. This summer— it’s all about the perfect snapshot mid-vacation holding a suitcase handle, or an iced latte, or a beach book. Whichever it may be, you catch my drift.
Save Pin